I have never been a big fried potato fan, however two things I do like are hash browns and Home Fries. Home Fries are easy and hearty. They are good for breakfast or for dinner....or lunch for that matter. I think you will enjoy these.
Home Fries
4 to 6 Yukon Gold potatoes (or any other if you prefer)
2 Tbsps. vegetable oil
1 tsp. real butter
1/4 small white onion, finely diced
1 Tbsp. ground pepper
1 Tbsp. sea salt
Whether you peel your potatoes or not is totally up to you. Sometimes I do, sometimes I don't. Cut potatoes into small cubes. Heat oil and butter in skillet and toss in the potatoes. Add pepper and salt. Cook for approximately 10 minutes, tossing once or twice to prevent sticking. Add diced onions and cook another 5 to 8 minutes (or until the potatoes are fork-tender, but still maintain their crispness.
Can be topped with shredded cheddar cheese right before serving.
This snack is semi-healthy and so good. It is fried, but if you fry it in good oil, it maintains the healthy aspect. I mix a variety of seasonings, quickly deep fry these little beans and season them. They are full of protein, lightly coated and full
of flavor! These are really good in a salad!
Garbanzo Beans (ChickPeas) Snack
1 can Garbanzo Beans - drained completely
1 cup flour + 1 Tbsp. cornstarch
1" Sunflower or Vegetable Oil heated for frying
Seasonings Mix: (Mix in large bowl)
1 Tbsp. Lawry's Seasoned Salt
1 tsp. ground pepper
1/4 tsp. chili powder
1 tsp. Badia Complete Seasoning
Drain Garbanzo Beans completely. Spread out evenly onto a paper towel to drain. In a separate bowl, mix flour and cornstarch. Drop the beans into the flour mixture and shake lightly to coat. (I do 1/2 can at a time).
Shake the excess flour off lightly in a colander and drop into about 1" of oil. Fry for about 4 or 5 minutes, just long enough to get them lightly browned and crispy. Remove onto a paper towel for just a minute and then drop them into the seasoning mix and lightly toss to coat. Leave in the bowl until you add the second batch so that the seasonings are distributed evenly.
To Store: place in a covered bowl in fridge. They won't be as crispy once they are refrigerated, but they still taste wonderful.
Yummy!
With us today is Casey Grant. Casey is a culinary graduate of Sullivan College in Louisville, Ky. Thanks Casey for being with us today. This sounds wonderful.
Chicken burrito
This is a healthy option but one that is a very filling meal. We have been trying to eat some meals that are better for us and this was one that we will make again. The recipe is very easy and the kids even loved it. You can use whatever kind of tortillas that you would like, we used regular flour tortillas but I have used spinach before, as well. This makes a lot; we had leftovers but my husband likes the filling so much he just ate in from the bowl for breakfast.
Tortillas burrito size
2 pounds of shredded chicken
Chicken broth 2 boxes
Taco seasoning pack
3 cups of cooked brown rice (there are precooked bags of uncle beans rice that are pretty good, I always just add a few seasoning when I use them)
1 can of diced tomatoes or 3 medium fresh tomatoes, blanched, peeled and diced
1 can of black beans
Salt to taste
Pepper to taste
Cumin 1 teaspoon
Garlic powder 2 teaspoons
1 block of sharp cheddar cheese, shredded ( I only used half of this but feel free to add or leave out to make it even healthier)
Place the chicken broth in a large stock pan and add the chicken, cover and let boil until the chicken can be easily shredded with a fork. (you may have to add more chicken broth or water)
After the chicken is cooked take ¼ cup of the broth and wise the taco seasoning in and pour over chicken and mix together.
Cook the rice (if your using the precooked rice just put it in a large skillet). Add the salt, pepper, cumin, and garlic powder mix well. Add the beans and tomatoes and cook for about 10 minutes until the mixture is heated through. Add the chicken and mix together, heat through and add the cheese and cover until its melted.
Add about ½ cup of the mixture into a tortilla and wrap
Cook in a nonstick pan for a few minutes until the wrap is sealed and lightly browned
If you love eggs as much as I do, then you will love my Egg Salad. It is creamy and perfectly seasoned. I like to eat them with Triscuit Rosemary and Olive Oil crackers. They are my favorite! Sometimes, I make myself a sandwich with a toasted croissant. I hope you enjoy this recipe!
Egg Salad
6 to 8 hard-boiled eggs (see directions below)
1/4 cup Miracle Whip Salad Dressing (more or less)
1 Tbsp. Dijonnaise mayonnaise/mustard blend
1 tsp. Dill
1/2 tsp. sea salt
1/2 tsp. ground pepper
How to make the perfect hard boiled egg: Place eggs in a pan of COLD water. Make sure the water is cold and don't turn the burner on until the eggs are in the pan. Turn heat to high and once the water comes to a boil, boil the eggs for 10 minute. Turn off the heat and let eggs sit in the hot water for another 10 minutes. Drain water and cool under cold water. Once eggs are cool to the touch, place them back in the pan and shake, shake, shake! This will loosen the shells so that they peel right away. This process works about every time and will make it so much easier to achieve the perfect hard-boiled egg.
OK, so now you are ready to make your egg salad. Slice eggs in half, then half again and then chop into rough chunks. Place into a deep bowl and add salad dressing, Dijonnaise and seasonings. Mix well. If the mixture seems a little thick, you can always add more salad dressing until it is the desired consistency.
Serve with crackers or on a toasted croissant. Enjoy!
Peanut Butter is one of the staples of our life. It is such a good snack for kids and for adults as well. I love this peanut butter cookie recipe. When I created it, I added walnuts and used creamy peanut butter. They go very well together.
Peanut Butter Walnut Cookies Makes a large batch!
1 cup oil 2 cups all-purpose flour
1 cup creamy peanut butter 1 tsp. baking powder
1 cup white sugar 1 tsp. baking soda
1 cup brown sugar
2 beaten eggs 1 cup chopped walnuts
1 tsp. hazelnut flavoring (or vanilla)
Mix oil, peanut butter, white sugar, brown sugar, eggs and flavoring together. In a separate bowl, combine flour, baking powder and baking soda. Slowly stir into the wet ingredients, about 1/3 at a time. When well mixed, stir in the walnuts.
Roll into balls and place about 2" apart on a cookie sheet sprayed with cooking spray. Bake in a pre-heated 350 degree oven for about 12 to 15 minutes. Watch closely so they don't burn. Take them out when they are lightly browned on top and let sit on the hot cookie sheet for a couple of minutes. Remove to a cooling rack.
Enjoy!
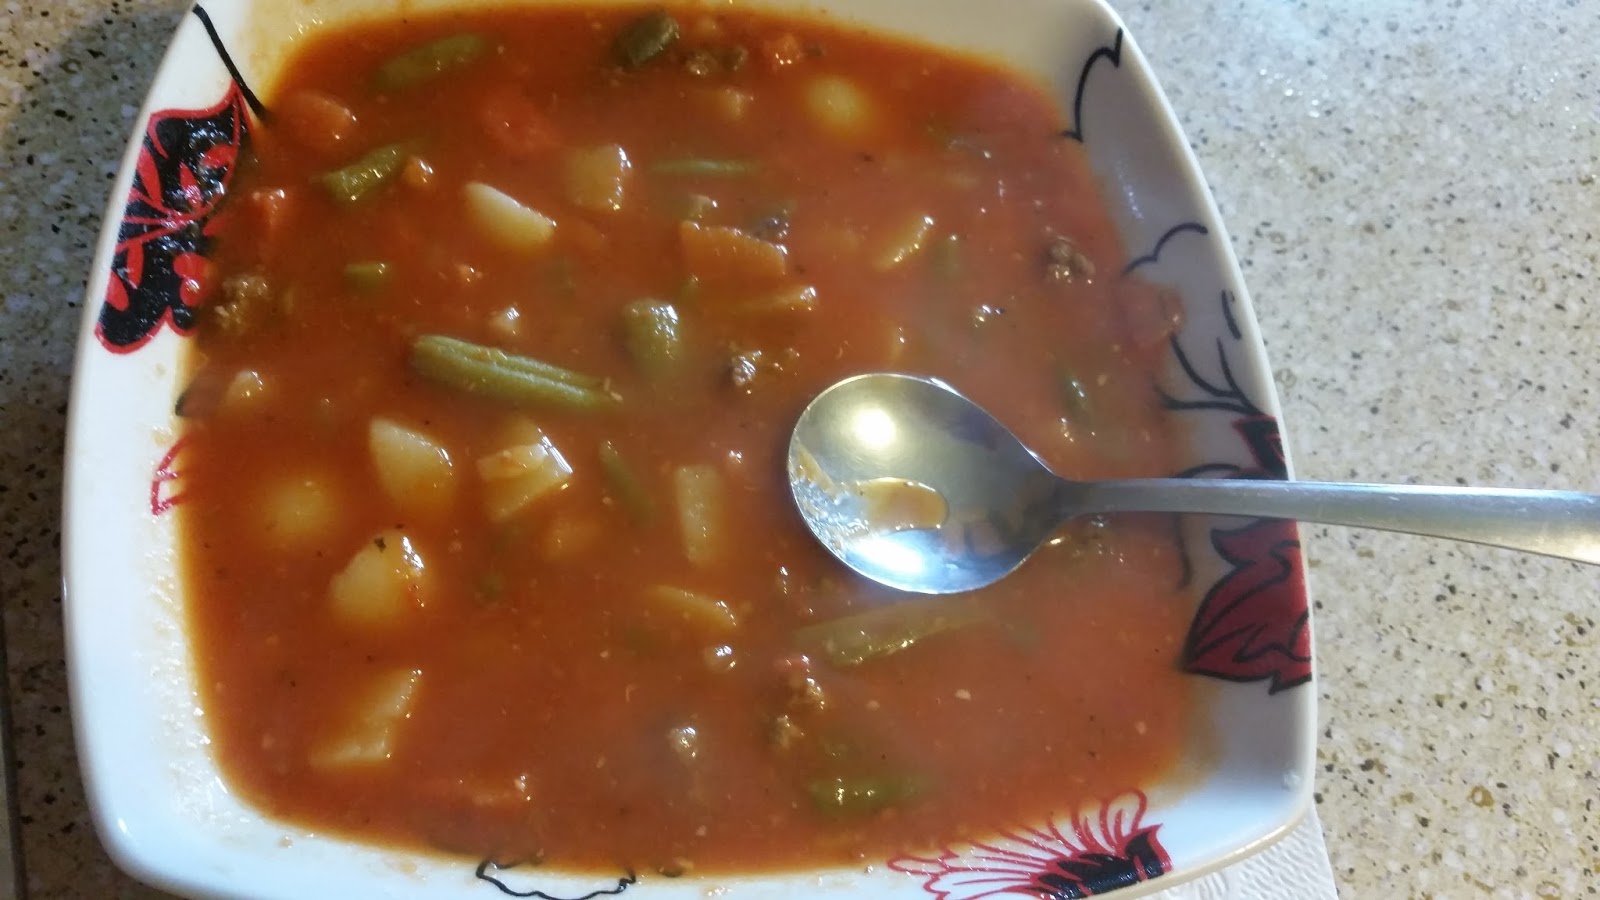
Vegetable Soup is hearty and really good for you. It is full of vitamins and richness. Try my easy Vegetable Soup. And remember, during the growing season in the summer, any of these vegetables can be replaced with fresh ones for an even healthier soup.
Vegetable Soup
1/2 lb. lean ground chuck
1 20 oz. can of crushed tomatoes
1 15 oz. can of green beans
1 can of whole potatoes, cut into large cubes
1/2 small white onion, diced
1 15 oz. can of mixed vegetables
1 can petite diced tomatoes
1 can beef broth
1 can chicken broth
1 stalk celery, chopped
1 Tbsp. ground pepper
1 Tbsp. sea salt
1 Tbsp. Badia Complete Seasoning
In deep Dutch Oven, brown ground chuck with the celery and onion, but leave it as chunky as possible. Remove from pan and drain in colander. Add back to pan and add crushed tomatoes, cans of vegetables and broths. Add seasonings. Bring to a boil and reduce heat to medium. Cook for 30 minutes, stirring occasionally to prevent sticking.
Badia Complete Seasonings are available at Aldi and on Amazon.com. You can use Italian Seasonings if you don't have it, but the Badia is fabulous!
Serve and Enjoy!
You are getting the "Full Meal Deal" today! This Crispy Cod Filet is very lightly breaded and seasoned with Rosemary to compliment the Rosemary Garlic Mashed Potatoes on the side. Enjoy!
Crispy Cod Filets
4 Cod Filets - thawed
1 cup all-purpose flour
1/4 cup Panko Bread Crumb
1 tsp. Rosemary
1 tsp. sea salt
1 Tbsp. ground pepper
1 Tbsp. real butter + 1 Tbsp. olive oil
Mix flour and Panko on a paper plate or deep/wide bowl. Add rosemary, sea salt and ground pepper and stir well. On Griddle or flat skillet, melt 1 Tbsp. real butter and 1 Tbsp. olive oil. Gently press the fish filets into the flour/panko mixture. Coat lightly on both sides and shake off any access.
Fry in hot butter/oil mixture until crispy on both sides. Takes about 10 minutes.
Note: For a lighter, healthier recipe you can omit the butter, but it does take away from the taste.
Meanwhile:
Rosemary Garlic Mashed Potatoes
4 to 6 medium potatoes, peeled and cut into large cubes
2 quarts water
1 Tbsp. sea salt
1 tsp. Rosemary
1 Tbsp. ground pepper
2 Tbsp. real butter
Evaporated Milk (appr. 1/4 to 1/2 cup)
Boil potatoes over high heat until they are fork tender. Remove and drain. Add butter and seasonings to the dry pan and readd the potatoes. Let them sit for about 2 or 3 minutes for the butter to start melting. With mixer on low, start adding the evaporated milk 1/8 cup at a time. Continue to beat and add milk until potatoes are creamy and lumps are gone.
There are two main reasons why cooks end up with lumpy, thick mashed potatoes.
1. Their potatoes aren't fully cooked. You should be able to mash them
easily and completely with a fork.
2. They don't use enough milk. Add your milk a little at a time making sure that
your potatoes don't look dry.
Most people love my mashed potatoes because they are so creamy. You can do it too!
Enjoy this Crispy Cod and Rosemary Garlic Mashed Potatoes....it is a meal that will truly please even the pickiest eater in your house!
I was given this recipe years ago and I absolutely love it, however I have changed it slightly over the years. I've heard it called Better Than Robert Redford Dessert, but I make it a little different. I don't make this often because it is my favorite dessert and is so sinfully good! It takes a little while to make all the layers of this dessert come together, but oh my it is fantastic!
Decadent Dessert
Crust:
1 cup all-purpose flour
1 1/2 cup chopped walnuts + 1/4 cup for garnish
1/2 stick real butter, softened
Layers:
1 (8 oz.) package of cream cheese, softened
1 cup powdered sugar
1 (8 oz. container French Vanilla Cool Whip
1 tsp. hazelnut flavoring (or vanilla)
2 cups whole milk
2 (3.5 oz. boxes instant pudding, any kind (I use Hershey's Chocolate)
Combine flour, 1 cup of walnuts and butter. Mix well and pat into the bottom of a 13x9x2" pan sprayed with cooking spray. Bake at 350 degrees for approximately 12 to 15 minutes or until crust starts to very lightly brown. Remove from heat and cool completely. (I put it in the freezer if I am in a hurry).
In large bowl with mixer in low, mix cream cheese, and sugar until smooth. Gently stir in 1/2 the container of whipped topping. Spread over completely cooled crust.
Mix both boxes of chocolate pudding and 2 cups of whole milk. Beat until pudding firms up. I generally chill it in the refrigerator just about 5 minutes to help it set up completely. Spread over cream cheese layer. Sprinkle with 1/2 cup walnuts.
Finish by spreading the remaining container of Cool Whip topping over the top of the dessert and sprinkle the 1/4 cup of walnuts over the top for garnish.
Cover and chill for at least 2 hours before cutting to make sure it is completely set. Overnight is best. Cut into squares and serve.
Oh my, enjoy, enjoy, enjoy! You will see why this is my favorite dessert.
It doesn't seem to me that many people eat hominy anymore, unless it is in the form of grits. When I was growing up, my Mamaw loved hominy and made it quite often. Of course, I have kicked the recipe up a notch. I hope you enjoy this recipe. If you have never had hominy, give it a try!
Skillet Fried Hominy
2 cans white hominy
2 Tbsp. real butter
1/4 stalk celery, diced into very small pieces
4 - 6 baby carrots, diced into small pieces
1 Tbsp. minced onion flakes
4 Tbsp. Campbell's Cream of Chicken soup + 1 Tbsp. water
1 tsp. salt
1 tsp. ground pepper
Drain hominy completely. In skillet over medium heat, place butter, celery, carrots, onion flakes, and sauté until they are softened. Add the drained hominy and sauté for about 5 or 6 minutes more. Add salt and pepper. Beat the Cream of Chicken + the 1 Tbsp. of water together and pour into the skillet. Continue cooking until it is heated through and the soup has cooked down and thickened. It will stick to the hominy and give it a full, rich flavor. Remove from heat and serve.
Fun Fact: Hominy is hulled corn with the germ removed. The early pioneers in North America soaked the kernels in weak wood lye until the hulls floated to the top. They can be pureed and served as grits, fried whole, or shaped into patties and fried.
Oh my! Twice Baked Potatoes....yum yum! Years ago, there was a small local restaurant in the area called Cliff Hagan's. It had a fabulous salad bar and the best twice baked potatoes. Oh my, I can still remember those big fat potatoes stuffed with all sorts of good ingredients. Those potatoes are the inspiration for my own version of twice baked potatoes. I hope you enjoy these as much as I do.
Twice Baked Potatoes
4 large baking potatoes
2 - 3 cups of shredded cheddar cheese
1/2 stick real butter
4 Tbsp. milk
1 Tbsp. salt
1 Tbsp. ground pepper
1 tsp. Italian seasonings
1/4 cup sour cream
3 green onions, finely diced
Poke holes in potatoes with a knife and cover with clear plastic wrap. Place all 4 potatoes in the microwave and cook on high for about 6 to 8 minutes more or so. Check after 4 minutes by pushing down lightly on the tops to see if the potatoes have give. Once they feel soft to the touch, they are ready. Remove from microwave and take off plastic wrap (be careful it will be steamy).
Slice off a thin piece of the peeling from the top of the potato. Score the potato insides with a knife and remove by spoonful into a bowl (see below). You should have four peels with sparse bits of potato in them ready to stuff.
In a large bowl, place milk, sour cream, butter and seasonings. Add potato insides, green onions and let sit for just a minute so that the butter can start to melt from the potatoes. Using a mixer, beat these just as if you were making mashed potatoes. Add cheese and stir in. Scoop the potato mixture back into the skins, heaping them up over the top. Top with more cheese and place back into the microwave just long enough to melt the cheese. Sprinkle tops with the Italian Seasonings and serve.
You should have potatoes left over that you can use the next morning to make Potato Pancakes.
*Hint: If you want your potatoes to be fluffier inside, while they are still in the plastic wrap, gently tap them on the counter on all four sides at least once or twice. Careful not to break them, so be gentle. It will release the insides of the potatoes from the peels and be easier to scoop out.